Does it make me a bad homeschool mom that I am a timeline failure? Try as I might, I have never been consistent with keeping a history timeline.
I have had all the supplies on hand for years. I have printed out timeline binder pages. I have taped timeline strips to my walls. I purchased timeline figures so I’d have them handy. But, I’ve never been consistent about having the kids add figures to their timelines. Until now!

How to Build a History Timeline You’ll Actually Use
This year, as we started Mystery of History Volume 1, I was determined to make and have Emma use a history timeline. I scoured Pinterest for ideas, and I found plenty of them. It didn’t take long, however, to decide on just how to make a timeline that we would really use.
The first thing I had to decide was how to use our timeline. Would it be for all subjects, or would we just use it for history? Would I mark the centuries on each row, or would we just hang our pieces chronologically? Did I want a timeline to run the length of the room, a binder, or a smaller timeline on one section of our wall?
I decided that it would be only for history. I knew I wouldn’t keep up with dates from our literature, music appreciation, and Bible studies. I didn’t want to have to check through all of my timeline figures to see if I had one for each lesson. I decided that I didn’t want to bother with marking dates on the timeline itself. That was a chore I didn’t want to tackle. And, I knew I wanted a wall timeline that was concise and easy to use at a glance.

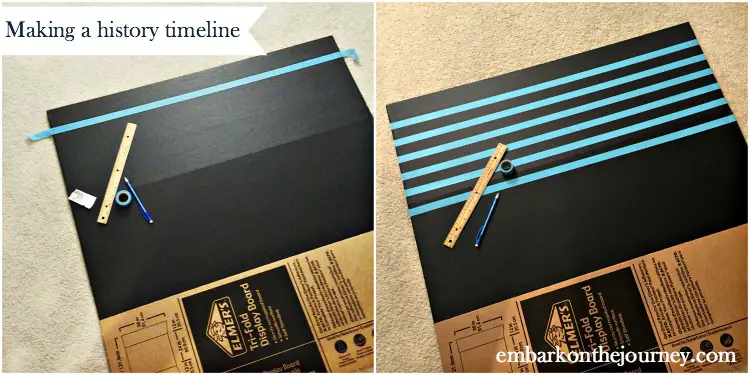
We rearranged our schoolroom this summer, and I only had one section of wall that would work for our timeline. It wasn’t a very big section. So, I decided to make our timeline on a trifold project board (the kind you see at science fairs). On the day I went to Michaels to purchase the board, all they had in stock was black. So, our timeline board is black. At first, I didn’t like it, but it really stands out on the wall, and the timeline figures really stand out on it.
I gathered up some plain washi tape I had lying around in the schoolroom, and I started creating the timeline. I used a ruler to mark 1″ sections on both long sides of the board. I then connected the marks with strips of washi tape. The colors don’t have any particular meaning except that I ran out of one color and started working with the next one.
Once all my lines were taped down, I used thumbtacks to put the timeline on the wall. Be sure you have longer tacks, because the shorter ones I started out with kept popping out.

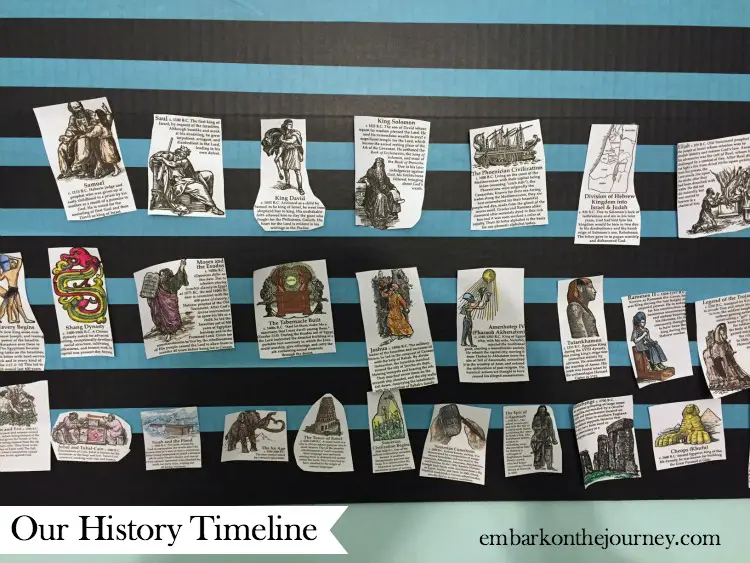
Now that our timeline was hung, it was ready for use. Each week, in our history lessons, there is a list of timeline figures to add to the board. When I’m planning, I print these figures from my Homeschool in the Woods timeline figures. Emma colors them, and she uses double-stick tape to add them to the timeline.
She just adds the figures chronologically from left to right on the board (starting at the bottom). When she gets to the end of a row, she moves up one and starts at the left again. I know it would be better to start the next row on the same side as the previous one ended, because it would create a flow. But, I really was just going for easy-to-use so that we’d actually use it.
To make things easier for me, I can open up the pre-written lesson plans in Illuminations and print out a timeline schedule. It tells me which timeline figures to copy for the week. To make things even easier, the schedule in Illuminations tells me what page in the Homeschool in the Woods pack I need to photocopy. I don’t have to search through the figures or through the table of contents for each figure. Illuminations has done the legwork for me.

As you can see, we have a very simplistic, very user-friendly history timeline that works for us. Do you have a timeline? How do you use it?

thank you good idea
Oh! I started a timeline last year to go with the Magic Treehouse books we were reading, and gave up because I ran out of space. Love this simple idea!
I love the idea of a MTH timeline!
I have tried to do a timeline, but very simply on paper. I love this idea! I bet you can just print out figures to add, yes?
I love this idea!
I am right there with you! I have been failing at timelines as well. Pinning this to try next year. Thank you for sharing on the Faith Filled Parenting LinkUp.
This is a great timeline for all sorts of school projects. I don’t have a child in school anymore and I was trying to figure out ways to use it for school projects. 🙂 Thanks for sharing your post at the Over the Moon Link Party.
Yes, you can!